Hi, everyone! We’re so excited you’ve found the perfect template for your event. Whether you’re planning a party, wedding, or special occasion, downloading your design is quick and easy. Follow the simple steps below to get your template ready in no time! Let’s dive in and start creating something amazing for your big day!
In fact, I’ll even use one of my absolute favorite Hello Kitty invitations as an example! Because let’s face it, nothing says “best party ever” like sending out an invite that has your guests humming “Mario time!” before they even RSVP. So, grab your digital pixels, and let’s dive into this step-by-step guide to creating a customized masterpiece that’ll have your guests feeling like they’ve stepped into Hello Kitty’s wonderland from the moment they open their mail! Trust me, it’s going to be pixel much fun!
First thing first, there are two basic ways on how to customize our invitations, going for Online-based app (Chrome Extension) or Offline-based app, in which allows you to customize the template using Adobe PDF Reader with/without having access to Internet. Let’s get things started with the “Online-based” app customization.
Online-Based App
A. Installing the Adobe Acrobat PDF Reader (Chrome/Mozilla) Extension
You need to go to Chrome Web Store and Type “Adobe Acrobat” in the Search Extension Page or just click this “link” and wait until your browser bring you to the Adobe Acrobat Chrome Extension page. (See the following image)
- Now you need to click the “Add to Chrome” Button
- Your browser will pop up a message that ask you about the Installation, click the “Add Extension” and wait until the process is finished.
- If the process has successfully done, you should be able to see the “Adobe Acrobat PDF” button placed right next to your browser’s search/address bar. (See the following image)
B. It’s Time For Customization!
In order to be able to customize our PDF Invitation Template, you need to download our template first, in which you can see the In-Depth details on how to download our template “here“. If you had done it, then you are able to proceed to the following step-by-step:
- Click the “Adobe Acrobat PDF” Extension button and you should see the pop-up menu that shows like this (See below).
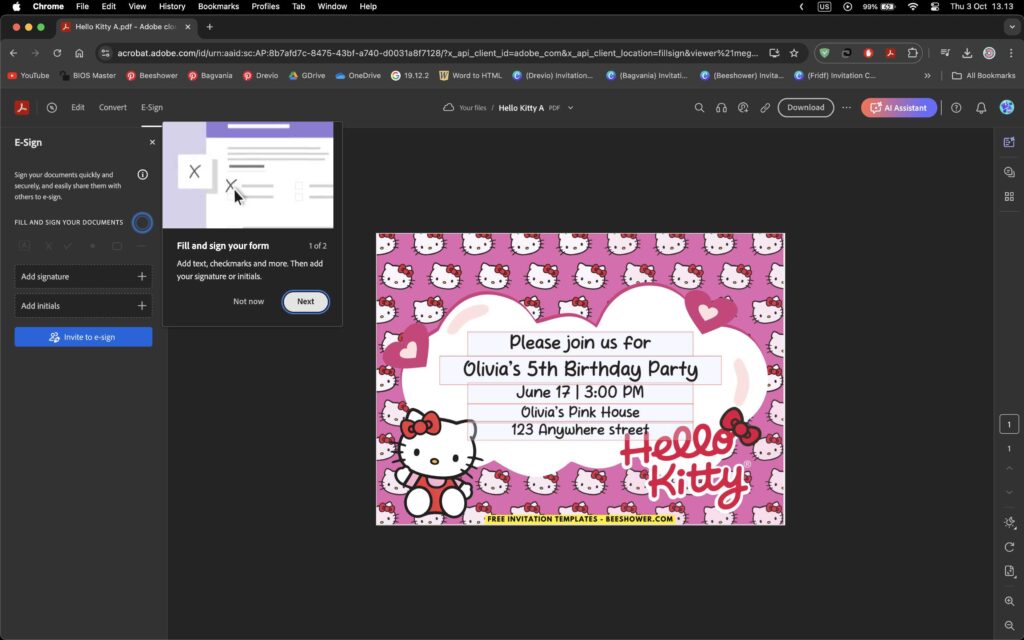
- Select/Click the “Sign” > Fill & Sign and your browser will direct you to a New Tab and proceed to the Adobe Acrobat Editing Page like this,
C. Customization (For Real This Time!)
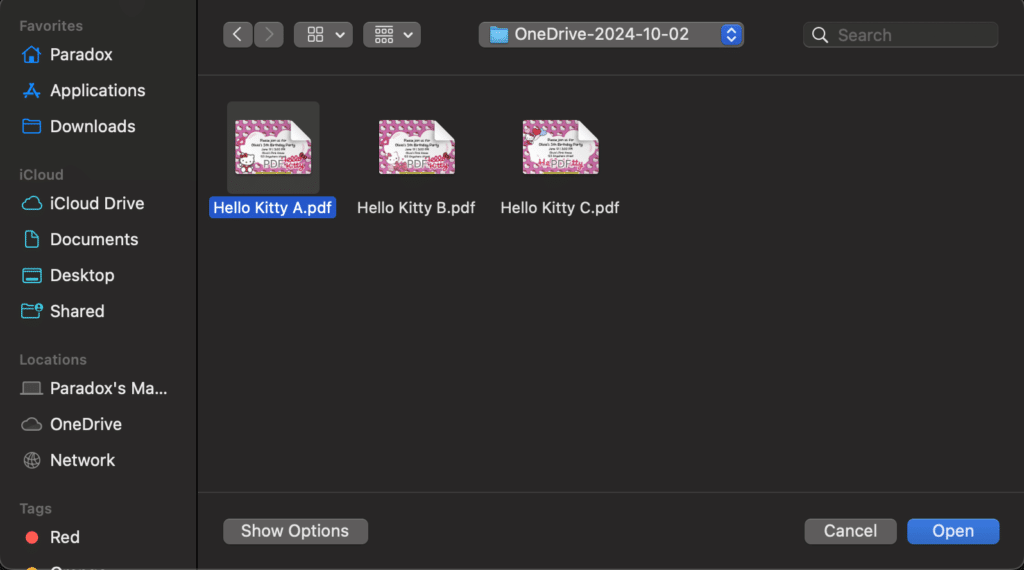
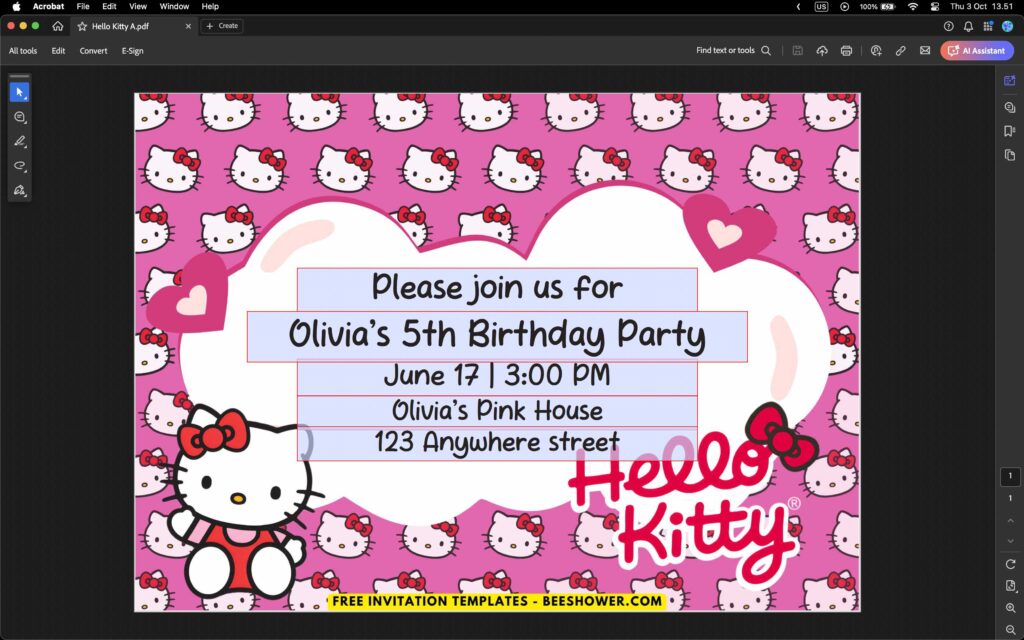
Now select the template file (in which I’m going to use my Hello Kitty themed invitation and show it as an example like what I said earlier). You can either simply Drag-Drop or Select the File from your My Computer.
- Locate where you saved the invitation template, click the one you want to customize and Open it. Wait until the process of Uploading is done and the page show you the Editing page/menu.
D. Personalize the Text (For Your Little Hello Kitty Fans)
First things first—let’s make sure the invitation is all about your little one. Swap out the default text with their name and party details, but don’t stop there!
How to Personalize the Text?
- Hover your mouse on each text-field and Click it.
- And if you’re feeling extra fancy, switch up the font to something whimsical or cute pixel-style (Pro Version only). Think Bold letters, pixel fonts, or even an elegant cursive for that true Mario touch. Easy, right?
- Don’t forget to add little details like Hello Kitty-inspired phrases or something like these:
- “Join us for a magical adventure through Hello Kitty World!”
- “Let the pink magic begin at [your kid’s name]’s birthday!”
E. Handwritten Love: Add Your Personal Touch
Want to make it extra special? Leave space to handwrite the birthday child’s name or a little note. Or, use your printable template to create DIY Frozen-themed stickers and seals. It’s an easy way to add that heartfelt, personal touch without too much effort.
Offline-Based App
First of all, you need to get PDF Editor/Reader software to get all freedom to customize our PDF Invitation templates on your smartphone and Computer. There are hundreds softwares out there, and I’d say the clear winner would be Adobe Acrobat (Standard & Pro Ver.).
System Requirements
Before you install, always make sure that your system meets the minimum system requirements. Installing Acrobat Reader on older operating systems You need Windows 7 or later to run Acrobat Reader.
If your operating system is older, you can install an earlier version of Acrobat Reader. For step-by-step instructions, see Install an older version of Adobe Reader | Windows.
A. Download and install Acrobat Reader
Follow these steps to install Acrobat Reader using Google Chrome.
- Close all versions of Acrobat Reader.
- Close any browser that is displaying a PDF.
- Go to the Adobe Acrobat Reader download page and click Download Acrobat Reader.
- Click Save to download the Acrobat Reader installer. When the downloaded file appears at the bottom of the browser window, click the .exe file for Acrobat Reader. Wait until the process is done
For Older Version of Google Chrome: You will see the download file at the bottom-left of your browser | For the newer version: Click the download button placed next to the Address Bar
Note: Acrobat Reader installation is a two-part process: The installer is downloaded, and then Acrobat Reader is installed. Be sure to wait until both parts are complete. A progress bar displays the time remaining.
- When you see the confirmation message that the installation is complete, click Finish.
B. Customization
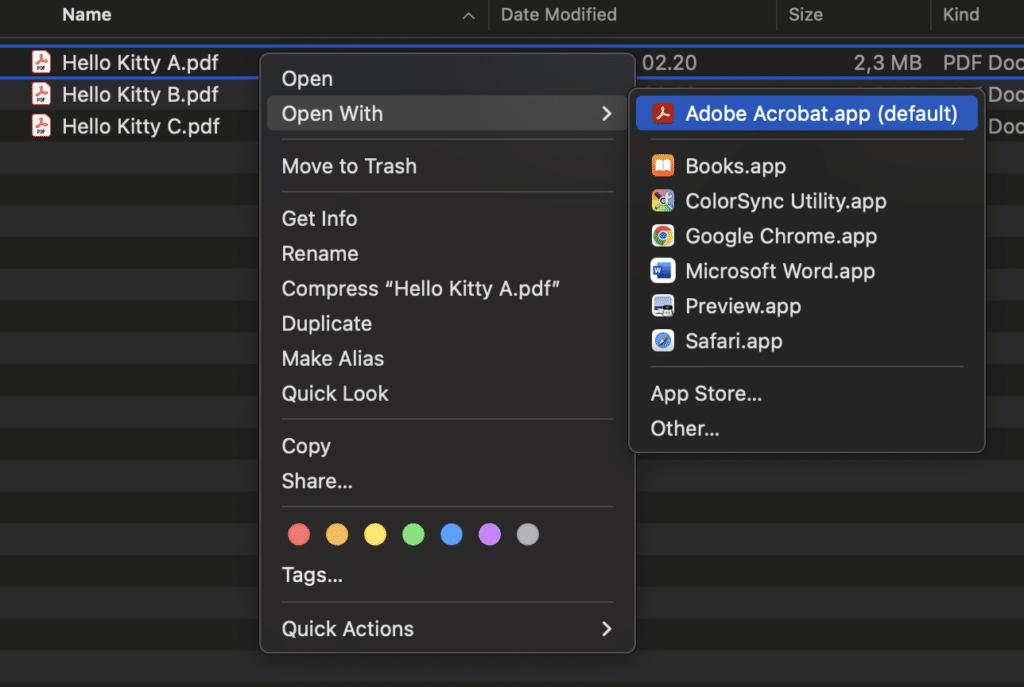
For the most part, the customization process would be the same as we do it on Adobe Acrobat Reader on Chrome Extension. So, open the file using Adobe Acrobat software.
C. Save & Print the Final Design
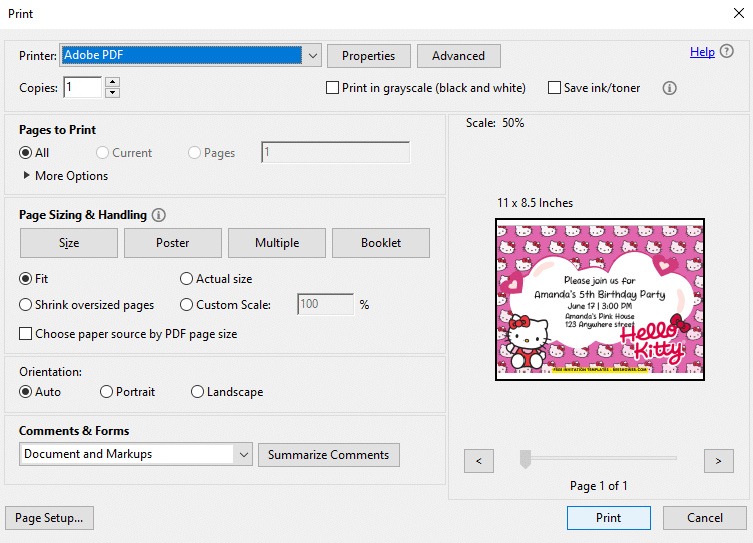
- Choose File > Print Button in the toolbar or tap “Ctrl + P” on your keyboard
- Select a Printer and number of Copies to print. (Optional)
- Click Properties to open the Printer properties. For more information, see your printer documentation.
- Under Pages to Print, select an option:
- All – prints all pages in the PDF.
- Current page – prints the current page in the PDF.
- Pages – specifies a subset of pages to print. You can enter individual page numbers, a range, or a combination. For example: 1, 6-18, 33, 98.
- More options – specifies additional options such as even or odd pages, and reverse pages.
- Specify other options as per your requirements:
- Page Sizing & Handling
- Orientation
- Comments & Forms
Note: As you change the settings, the print preview is displayed. Click the arrow buttons at the bottom to preview the other pages.


